Add and Edit Blog Posts
The Blog feature lets you create, maintain, and publish articles on your site. It provides tools to edit your individual post and blog designs, letting you provide a reliable stream of personalized content to attract visitors and create interest in your site.
Create Blog Posts
To create new blog posts:
- In the left panel, click Blog.
- Click New Post.
- Type a Post title for the blog, and select the Post author.
- To add a main image, click +Image and select or upload an image.
- Click Start.
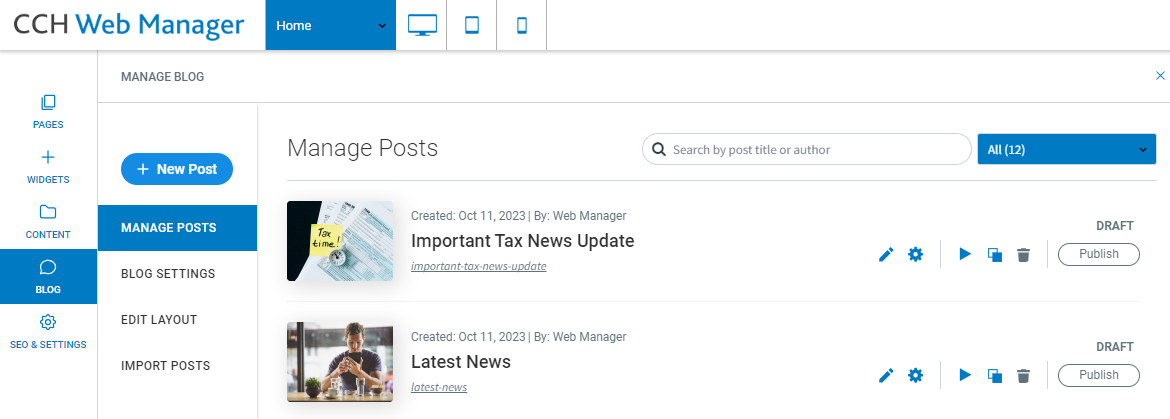
Manage Posts
To add, publish, unpublish, edit, or remove posts from your blog, in the left panel, click Blog, and then click Manage Posts.
Edit Blog Posts
To edit existing blog posts:
- In the left panel, click Blog, and then click Manage Posts.
- Next to the post you want to edit, click the
Edit (
 )
icon.
)
icon.
To edit the post settings associated with a blog post, click the
Post Settings ( ) icon and see Manage Post Settings for more information. Post settings include post status, post details, and post metadata including tags.
Blog Stats
As part of our stats module, we track blog posts page views. To see blog stats, from the dashboard, click Stats, and then click Content Data. See the Individual Page Details section for information on blogs.
Edit Layout
Change the design of the blog post page. Any changes you make to this page affects how all posts display on your blog. You can add widgets to enable additional text, graphics, social media, and other effects. Editing the post design only changes the general layout of posts by adding or deleting widgets, rows, and columns. This does not let you change the text or graphics of an individual post.
To edit the layout of all blogs, in the left panel, click Blog, and then click Edit Layout.
Manage Post Settings
To add, publish, unpublish, edit, or remove posts from your blog, in the left panel, click Blog, and then click Manage Posts. Next to a post, click the Post Settings icon.
Post Status
The post status is listed at the top of the section, and you can configure the post URL, and publish date for the post. Post status includes:
- Post URL (Permalink). Type to change the post URL, or click Copy to copy the URL to the clipboard. The post must be published copy the URL.
- Change publish date. Changing the publish date changes the order of posts in the blog.
Click Unpublish or Republish, as needed.
On unpublished posts, click Publish, or click Schedule post to select a date and time for the post to be published.
Post Details
Add main post details to be connected to the layout and inherit the layout design. Post details include:
- Post title. Type a short title for the blog post.
- Post author. Select an author from the list. Only users who have been granted blog access to the site are eligible blog authors.
- Post main image. Click +Image to select or upload a main image for the post.