
Contact Form Widget
Use the Contact Form widget to add a complete web form to your site. The Contact Form widget allows you to provide visitors with a variety of input areas; specific text, drop-down, radio buttons, check boxes, date, time, email, and phone numbers. You can use the form for email newsletter opt-ins, customer questions, or simply to gather feedback from your site visitors.
NOTE: On radio buttons and check boxes, you can add images to display for the options. The images will not appear in the email received from the form submissions, but the selected label appears (even if hidden on the site).
To add the widget:
- In the left panel, click Widgets.
- Click and drag the Contact Form widget into your site.
To learn more about adding widgets to your site, see Add Widgets.
Content Editor
To access the content editor, right-click the widget, and click Edit Content.
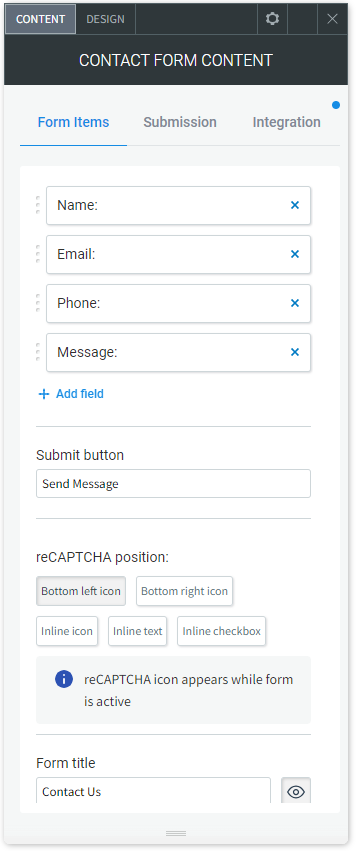
On the Form Items tab:
- Decide what information you would like to collect from your visitors and then modify the existing fields by clicking the name of the field. To add new fields, click Add Field.
- Type the text you want to appear on the Submit button.
- To add reCAPTCHA validation, click the Add reCAPTCHA validation toggle, and select a reCAPTCHA position. This protects your form from spammers and speeds up the form submission process for site visitors. Select to display the reCAPTCHA as an icon or text in the form. This capability is automatically enabled on new forms you build.
- Type a Form title. To hide the form title, click the eye icon.
Add Free Text Field
To add a different notification, add a Free Text field. The field appears as a notification below the fields of your contact form.
NOTE: There is no default GDPR or privacy-related placeholder text in the free text field, as this is a multi-purpose field, so you need to place your custom text.
File Attachments
Files can be attached to submissions by creating a file attachment field in the contact form. Links to uploaded files are available in the form submissions’ download file, as well as in any of the form integrations such as Webhooks and Google Sheets.
NOTE: Site visitors are not be able to upload files larger than 10MB.
- Click a contact form to open the Content editor.
- On the Form Items tab, click Add field, and select File attachment from the Field type drop-down.
- To change the name of the field, type Placeholder text.
- A link to upload files is added to your form.
Contact Form Submissions
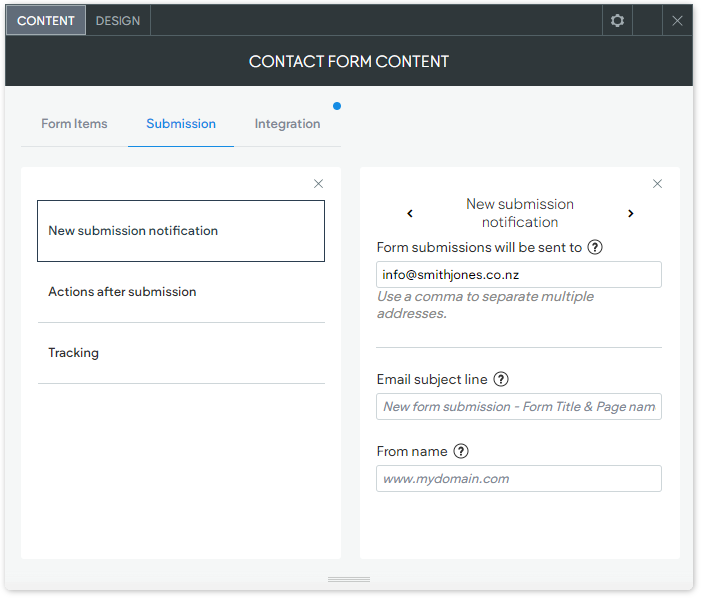
New submission notification
In the Form submissions will be sent to field, enter the email address that you want to receive notifications to when a form is submitted. You can also specify the Email subject line and set a From name for the form submission email notification.
NOTE: If an email address isn't added to the Form submissions will be sent to field, the primary email set under Business Info (which can be found by clicking Content in the editor's left menu bar) will be used. If no such email exists, the account owner will be used as the default submission recipient. All form submissions can be found in the Form Responses section in your Site Overview.
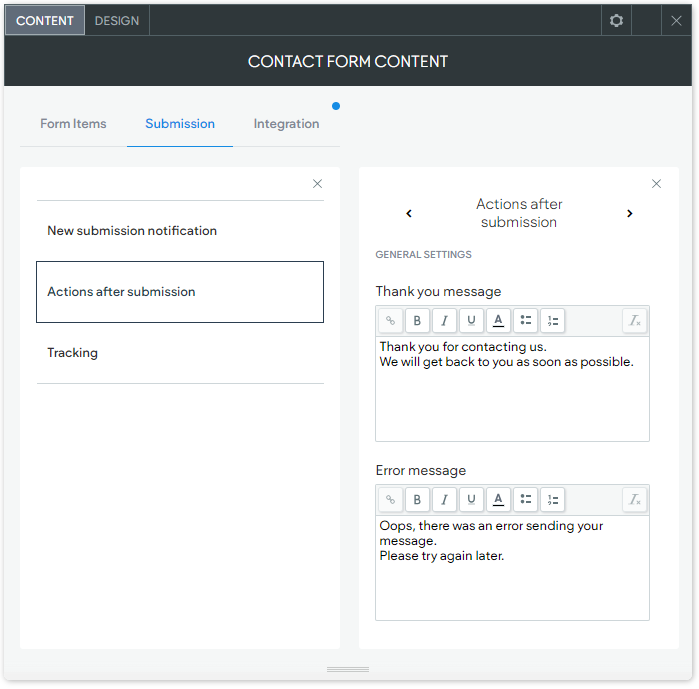
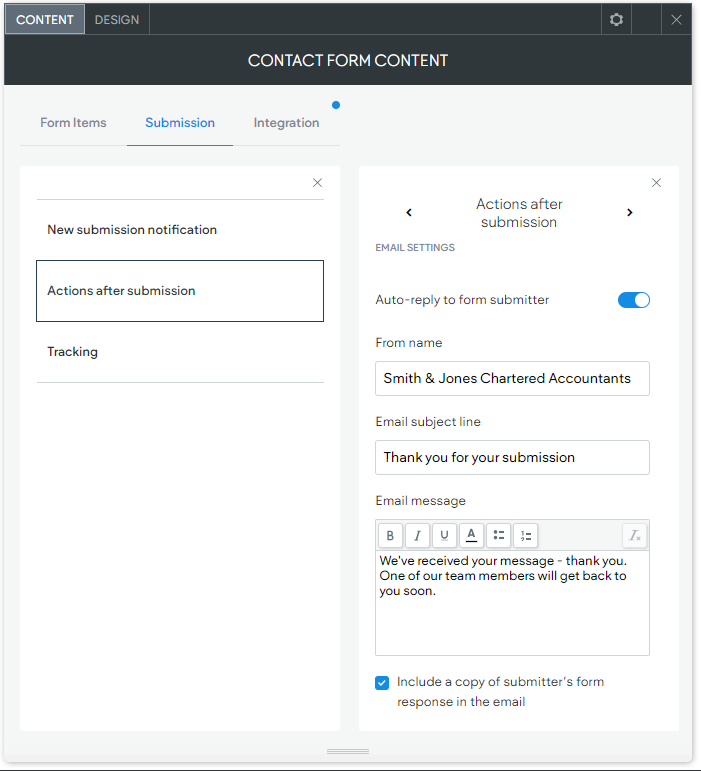
Actions after submissions
To set the confirmation and error messages to display when visitors submit a form, click Actions after submission.
Use the Rich Text Editor to add color, emphasis (bold, italics and underline), and bullets to text in the message boxes.
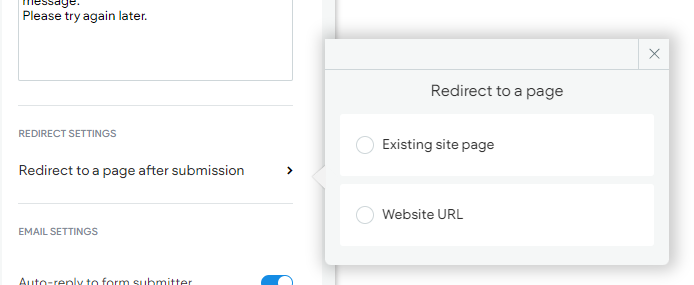
To have the form redirect to a page after submission, click the
Redirect to a page after submission option. You can choose to redirect to a page within your website or to an external website URL.
Customer Confirmation Email Settings
By default, an auto-reply will be sent to the form submitter (as long as their provided email address is valid). To turn this off, toggle the Auto-reply to form submitter option off.
You can also set the Form name (the name you enter here will show in the sent email’s “From” field), Email subject line, Email message, and set it to include a copy of submitters form response in the email (this is checked by default).
Tracking
To add tracking code to your form, click Tracking, and paste conversion code or AdWords in the field provided.
Contact Form Integrations
To extend the reach of your Contact Form, integrate it with Google Sheets, Mailchimp, Constant Contact, or a third-party application using Webhooks.
To add integrations, right-click the Contact Form, click Edit Content, and click the Integrations tab.
Google Sheets Integration
Use the Google Sheets integration to instantly add contact form submission data to a spreadsheet in Google Sheets. All contact fields in the form will be populated into the spreadsheet, including a time stamp of when the form was submitted.
- Click Google Sheets, and click Sign in with Google.
- Click Allow to grant permissions to connect to your Google account. If your computer is connected to multiple Google accounts, select the account you would like to connect to this form.
- Select if you want to add data to an existing spreadsheet or to a new one.
- Select the spreadsheet you would like to submit the form data to. You can select the spreadsheet from a list, or use the search bar to find a specific sheet.
NOTES
- If you have multiple forms on the site you can connect each one to a different spreadsheet, including spreadsheets in different Google accounts.
- You can connect a couple of forms to the same spreadsheet. In this case, make sure that the fields and order in the form are identical to fit the information submitted.
- Submitting form data to a Google spreadsheet does not prevent you from downloading the data as a .csv file, or from receiving form submission emails.

MailChimp Integration
MailChimp is a tool for the distribution of email campaigns, newsletters, and so on. By using the new form integration, site owners can manage contact lists of potential clients (site visitors) by collecting email addresses, which are submitted to the form and send them automatically to MailChimp.
You must have a MailChimp account. Once you have an account, create a mailing list in your MailChimp account where the contact details will be collected.
- Click MailChimp, and then click Connect to MailChimp.
- Sign in with your MailChimp credentials.
- Select your MailChimp contact list from the drop-down menu.
- Configure your form fields. In addition to the email address, you can automatically send first name and last name fields to MailChimp. You must set up the email, first name, last name fields within the form.
NOTE: The only fields you can connect to MailChimp are First Name, Last Name, and Email. The integration will only work if you configure the fields with the exact same name on the Contact Form. A field may be left empty if you select to Leave this field empty in the drop-down menu.
Tip: If you have already configured your MailChimp integration and want to test your form with a test email, MailChimp may block test emails without notice (for example, test@test.com). To test your MailChimp integration, we recommend using a real email.
Constant Contact Integration
This is a similar integration to MailChimp, but allows site owners to create mailing lists in their Constant Contact account.
You must have a Constant Contact account. Once you have an account, create a mailing list in your Constant Contact account where the contact details will be collected.
- Click Constant Contact, and then click Connect to Constant Contact.
- Sign in with your Constant Contact credentials.
- Select your Constant Contact list from the drop-down menu.
- Configure your form fields. In addition to the email address, you can automatically send first name, last name, and phone number to Constant Contact. The user is required to set up the email, first name, last name fields within the contact form. Email address and text message are added by default.
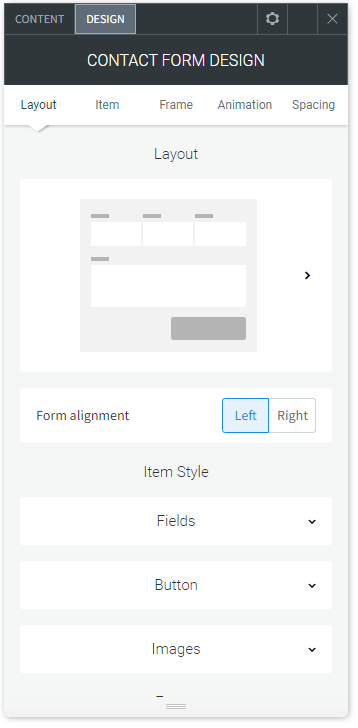
Design Editor
To open the contact form design editor, right-click the Contact Form widget, and click Edit Design. In the design editor, you can change the button layout, items, frame, and spacing.
Layout
On the Layout tab:
- Click the layout icon to select a layout design for the contact form.
- To change the form alignment, click Left or Right.
Item
On the Item tab:
- To make edits to the field style and field text, click Fields.
- To edit the button style and button text, click Button. To revert back to the global style, click Revert to global design.
Frame
On the Frame tab:
- To make edits to the frame style, click Frame Style. You can change the background by adding a color or image.
- To change the text style of the title, click Form Title.
- To change the text style of the submission notification, click Submission Message.
Contact Form Troubleshooting
If you are having issues with the contact form, see Contact Form Troubleshooting.
Manage and Delete Form Responses
To manage and delete responses received from a contact form:
- From the Site Overview, select Form Responses. Alternatively, from the left panel menu of the editor, click SEO & Settings, then click Manage Form Responses.
- The Form Responses page opens and allows you to remove any response to any form on the site. You can search for relevant responses in the Search responses search box. Ensure you search for the exact name, phrase, or characters.
- Click on the relevant form tab to open a table which includes:
- the date of the form response submission.
- the input from each of the form fields.
- the option to delete the form response.
- To export form responses in .csv format, right-click the form and click
Form responses.
NOTE: This option will not be available if there were no form responses on the live site.